
In case you’re one of the few who haven’t heard, my daughter, Rachel, became engaged to her boyfriend, Kyle, while on a cruise in Alaska. It was a total surprise to her. You can see the proposal here: Rachel & Kyle’s proposal. In honor of their memorable day I made a little keepsake remembrance by altering an Altoid tin!

I have a whole box of empty Altoid and other tins just waiting to become projects and I’ve been wanting to do one for some time but couldn’t find the inspiration. Then along comes a very special proposal. What do I visualize? Altered Altoid tin!
This is a great project to use those little scraps of pretty papers you’ve been saving. I flip my paper over and trace the tin. I cut inside the pencil lines and find it usually fits pretty good. Ink the paper, distress the edges then run them through a Xyron 2.5″ Create-a-Station. I like to decorate the papers while still on the Xyron backing, especially if you’re using brads or staples.

Gather all your other little embellishments and collage elements and spread them out on your work area. I used Globecraft Memories Piccolo Card Decor Set #1 along with Crafty Secrets Altered Fairies and Vintage Photos. The Piccolo set used here is Card Decor Set #1. Cut the little collage elements and punch out the Piccolo pieces then ink all the edges. I like to do general prep work on all the pieces in the beginning then I can add more to them later.

I like to use clear embossing powder on chipboard. It just brings the pieces come to life. Use Ranger’s Perfect Medium marker or tap them with a Versa Mark or other clear embossing ink pad and dip them in clear embossing powder and heat set.
I die cut a primitive heart from corrugated cardboard then spritzed with water and roughed it up a bit and used clear embossing powder on the edges. I love my corrugated cardboard hearts – they’ve nearly become a staple for me. I love to add the new wings from Globecraft Memories to them. I painted the wings black, clear embossed and added a tiny pinch of Pure Gold Glitter. Lightly heat this again so the glitter embeds into the enamel. When it cools I brush on a light coating of G&P Glossy Glastique to help protect them and make them more durable.

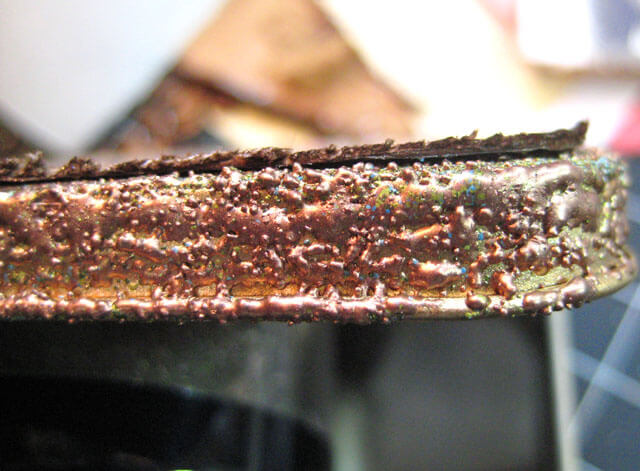
I wanted to add some texture to the Altoid tin so used G&P Vintage Copper Embossing Powder on the edges. It really added the texture I was looking for. I think I have about two to three coats here. It’s hard to tell. I just keep heating and dipping until I achieve the look I like.
Then it’s time to play! Place, move around, pop up, scrunch and move around some more until you get the pieces in a place that feels right. I added a number 2, which I painted black, then embossed with the Vintage Copper Embossing Powder. It turned out really cool. I cut out a mini song sheet, inked it and distressed the edges slightly and tucked it under the tip of the heart. This is in honor or Kyle who is a singer/songwriter.

I even cut a mini calendar from a checkbook register and circled the proposal date. This was a last minute thought and I must have spent a half hour looking for a mini calendar in the house rather than just print one! Once the placement is done on the cover and inside, and everything is glued in place, I coat a lot of the items in Ranger’s Clear Crackle Paint. What do you think? Click the photos to get a close-up look at the crackle.

I haven’t played with altering a tin in ages and this was really a lot of fun! Give it try. Just pull out some pretty scrap papers, some little bits and pieces, and some collage elements and sit and play.